Introduction technique
The procedure is performed under general anesthesia. The implant can be performed directly through the working channel of the bronchoscope, or by using a conventional introducer for silicone prostheses. The airway is accessed with a rigid endoscope.
The length and diameter of the area to be covered by the stent must be properly established. A simple method to determine the length of the affected area is to make a mark on the bronchoscope when its tip is at the end of the lesion, and repeat the marking after withdrawing it to the beginning of the lesion. The diameter of the bronchus should be estimated by comparison with the known diameter of the endoscope used.
Retrograde implantation method
- Lubricate the mouthpiece of the introducer with lidocaine gel, avoiding contact between the lubricant and the operator’s fingers.
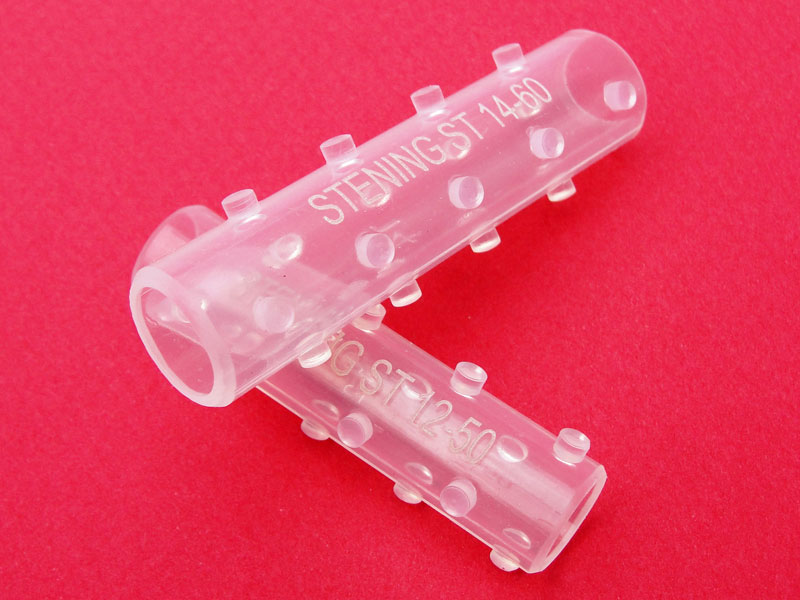
- Fold the Stening® along its axial axis and insert it into the prosthesis introducer through the mouthpiece.
- Remove the mouthpiece.
- Advance the tracheoscope tube past the affected area and position its distal end or bevel on healthy mucosa, exceeding the affected zone by approximately 5 to 7 mm.
- Place the introducer inside the tracheoscope.
- Press the ejector while withdrawing the tracheoscope at the same rate as the ejector plunger advances: the stent loader plunger is pressed as the endoscope is withdrawn.
The prosthesis is thus released. If necessary, it can be repositioned with alligator forceps; the maneuver is simpler if the stent is located “below” the lesion.
Anterograde implantation method
Steps 1, 2 and 3 are repeated. Then the bronchoscope containing the introducer and prosthesis is stopped 5 mm before the lesion to be treated, and the ejector plunger is pressed slowly. The prosthesis is thus ejected into the affected trachea.
Some stent loader models are not inserted into the bronchoscope, but are simply coupled to it at its proximal end, from where the stent is propelled. For this, the endoscope will have been stopped proximally or distally to the lesion as explained above, to push the prosthesis with the prosthesis loader plunger. The stent will then travel through the entire interior of the bronchoscope until it reaches the affected bronchus. At this point, a sudden reduction in the resistance to the pressure applied on the plunger will be perceived, indicating that the stent has begun to leave the interior of the endoscope.
Stent position correction
The stent may require additional maneuvers to correct or adjust its final position. It is preferable to correct a stent that has been deployed beyond the desired position rather than the opposite, since advancing a prosthesis that has been released “before” the affected area is highly inconvenient.
To move a stent proximally, it can be grasped by its edge and gently pulled. We strongly recommend, for its precision, a maneuver that consists of grasping the stent by its edge as mentioned, and then advancing the direct-vision optics inside the stent until its distal end is visualized. Then pull the forceps and you will see how the stent ascends through the airway. Stop pulling when you consider the position optimal.
Extraction technique
Intubation is performed with a rigid tracheoscope or bronchoscope as appropriate. Easy to extract, the silicone stent should be grasped firmly by its edge with alligator-tooth forceps. The forceps is rotated approximately 360° so that the stent folds, taking on an omega shape and thereby losing its radial resistance to compression. The forceps is then pulled to extract the prosthesis along with the tracheoscope.
The proximal end of the stent can be inserted into the tracheoscope. This maneuver protects the vocal cords during extraction. Other implantation and removal methods are possible depending on the operator’s experience and preferences.